
Today's topic is DIY! This is a very trendy thing for weddings these days - just ask Pinterest! However, it is very easy to go overboard and underestimate the sheer amount of work needed to do some of these projects. If you've never been a crafty person, think very carefully about if the time you need to invest is really worth the money you save. Also, some DIYs might seem like they save you money, but they end up costing nearly as much, especially if you mess up your first try and have to buy new supplies!
I ended up deciding not to do a few of my projects (like the floral arch made of PVC pipe that will never see the light of day). And during the last couple weeks before my wedding, all I could think about was how many things I needed to finish! With that being said, I wanted to share a few of my favorite DIYs that I think many people could pull off!
1) Garter belt -
This was a great way to throw a Hidden Mickey into the mix, and also get something blue in there. I bought some stretch lace from MaryNotMartha. It cost me $6 for a whole yard, including shipping. I used some leftover blue fabric scraps (would have cost less than a dollar for this small bit of fabric at Joann's) to make the fabric flowers, and I used rhinestones I already had to embellish the flowers (would have cost $6 at Joann's). Fabric glue (about $5) worked great to keep the flowers together and to stick them to the lace, and I made just one zig zag seam to turn the garter into a circle. By using fabric scraps, jewels and glue I already had, I saved some money, but had I bought everything specifically for this, it still would have been under $20 (because Joann's always has good coupons), which is way cheaper than the similar garters I was looking at on Etsy.
This is the tutorial I followed to create my garter - it's nice and simple and very versatile.
2) Decorating my shoes -
I wore Toms at my wedding, so I was already saving some money compared to many brides who opt for gorgeous things like Jimmy Choo's. But again, thanks to Pinterest, I wanted to add a bit of a personal touch to my shoes. I decided to cover the back tags with the words "I DO", with the "O" being a Mickey head. Originally I had thought of using fabric paint on ribbon, but slowly my idea morphed into embroidered letters on cloth. I bought a $2 embroidery hoop and 40¢ blue thread at Joann's (then had that knocked in half because of coupons!). I used black fabric, black thread and fabric glue I already had, but I don't think the project would have totaled more than $10 if I had needed to buy the extra supplies. The hardest part was hemming the edges of the black fabric because I didn't leave much of a seam allowance. I probably could have saved myself some time and headache by doing silver sharpie and using pinking shears rather than hemming, but I'm happy with how they turned out in the end.

If you're wearing other shoes, you could still probably do the heel embellishment like I did, or you could find some other way to decorate your shoes. If you're wearing heels, you could find some cool scrapbooking letter stickers or use puffy glitter paint to decorate the bottoms under the arch. I think it's fun to add personal touches whenever possible. This will allow you to pick something that's well within your comfort zone, but still showcase your individuality!
3) Pie topper -
We had pie because we got married on Pi Day and we are nerds. I always liked the idea of cake toppers, so I wanted to make something to adorn our pretty pie. I decided on skewers because they are small and light weight. The end product was three hearts (two big, one small) that read "K & N". Each heart was made of 4 pieces of paper, two slightly bigger than the others, and I did "calligraphy" with sharpies on the lighter colored paper. Using a glue stick, I assembled the paper layers and sandwiched the skewer in the middle. I used nice paper from a local shop called Two Hands. Nathaniel always gets beautiful paper for holiday gifts so I used some scraps of that to make our hearts. Construction paper would have worked fine (and been a little cheaper, too). The skewers cost $1.29 at Whole foods, and we already had the glue stick.
I had toyed with a few other ideas (painted peg doll people, washi tape banners, wire bent into cursive), but this seemed like the simplest and funnest project for me!
4) Veil and Bow -
My mother's veil was cathedral length, and had lovely lace on it. My dress is only knee length, so a long veil would have been weird. I ended up folding it in half and scrunching it up along the fold, then attaching it to a barrette. Turned out nicely, if I do say so myself ;) This cost me nothing. I borrowed the veil from my mom, and used thread and barrettes I already had (barrettes originally $4).


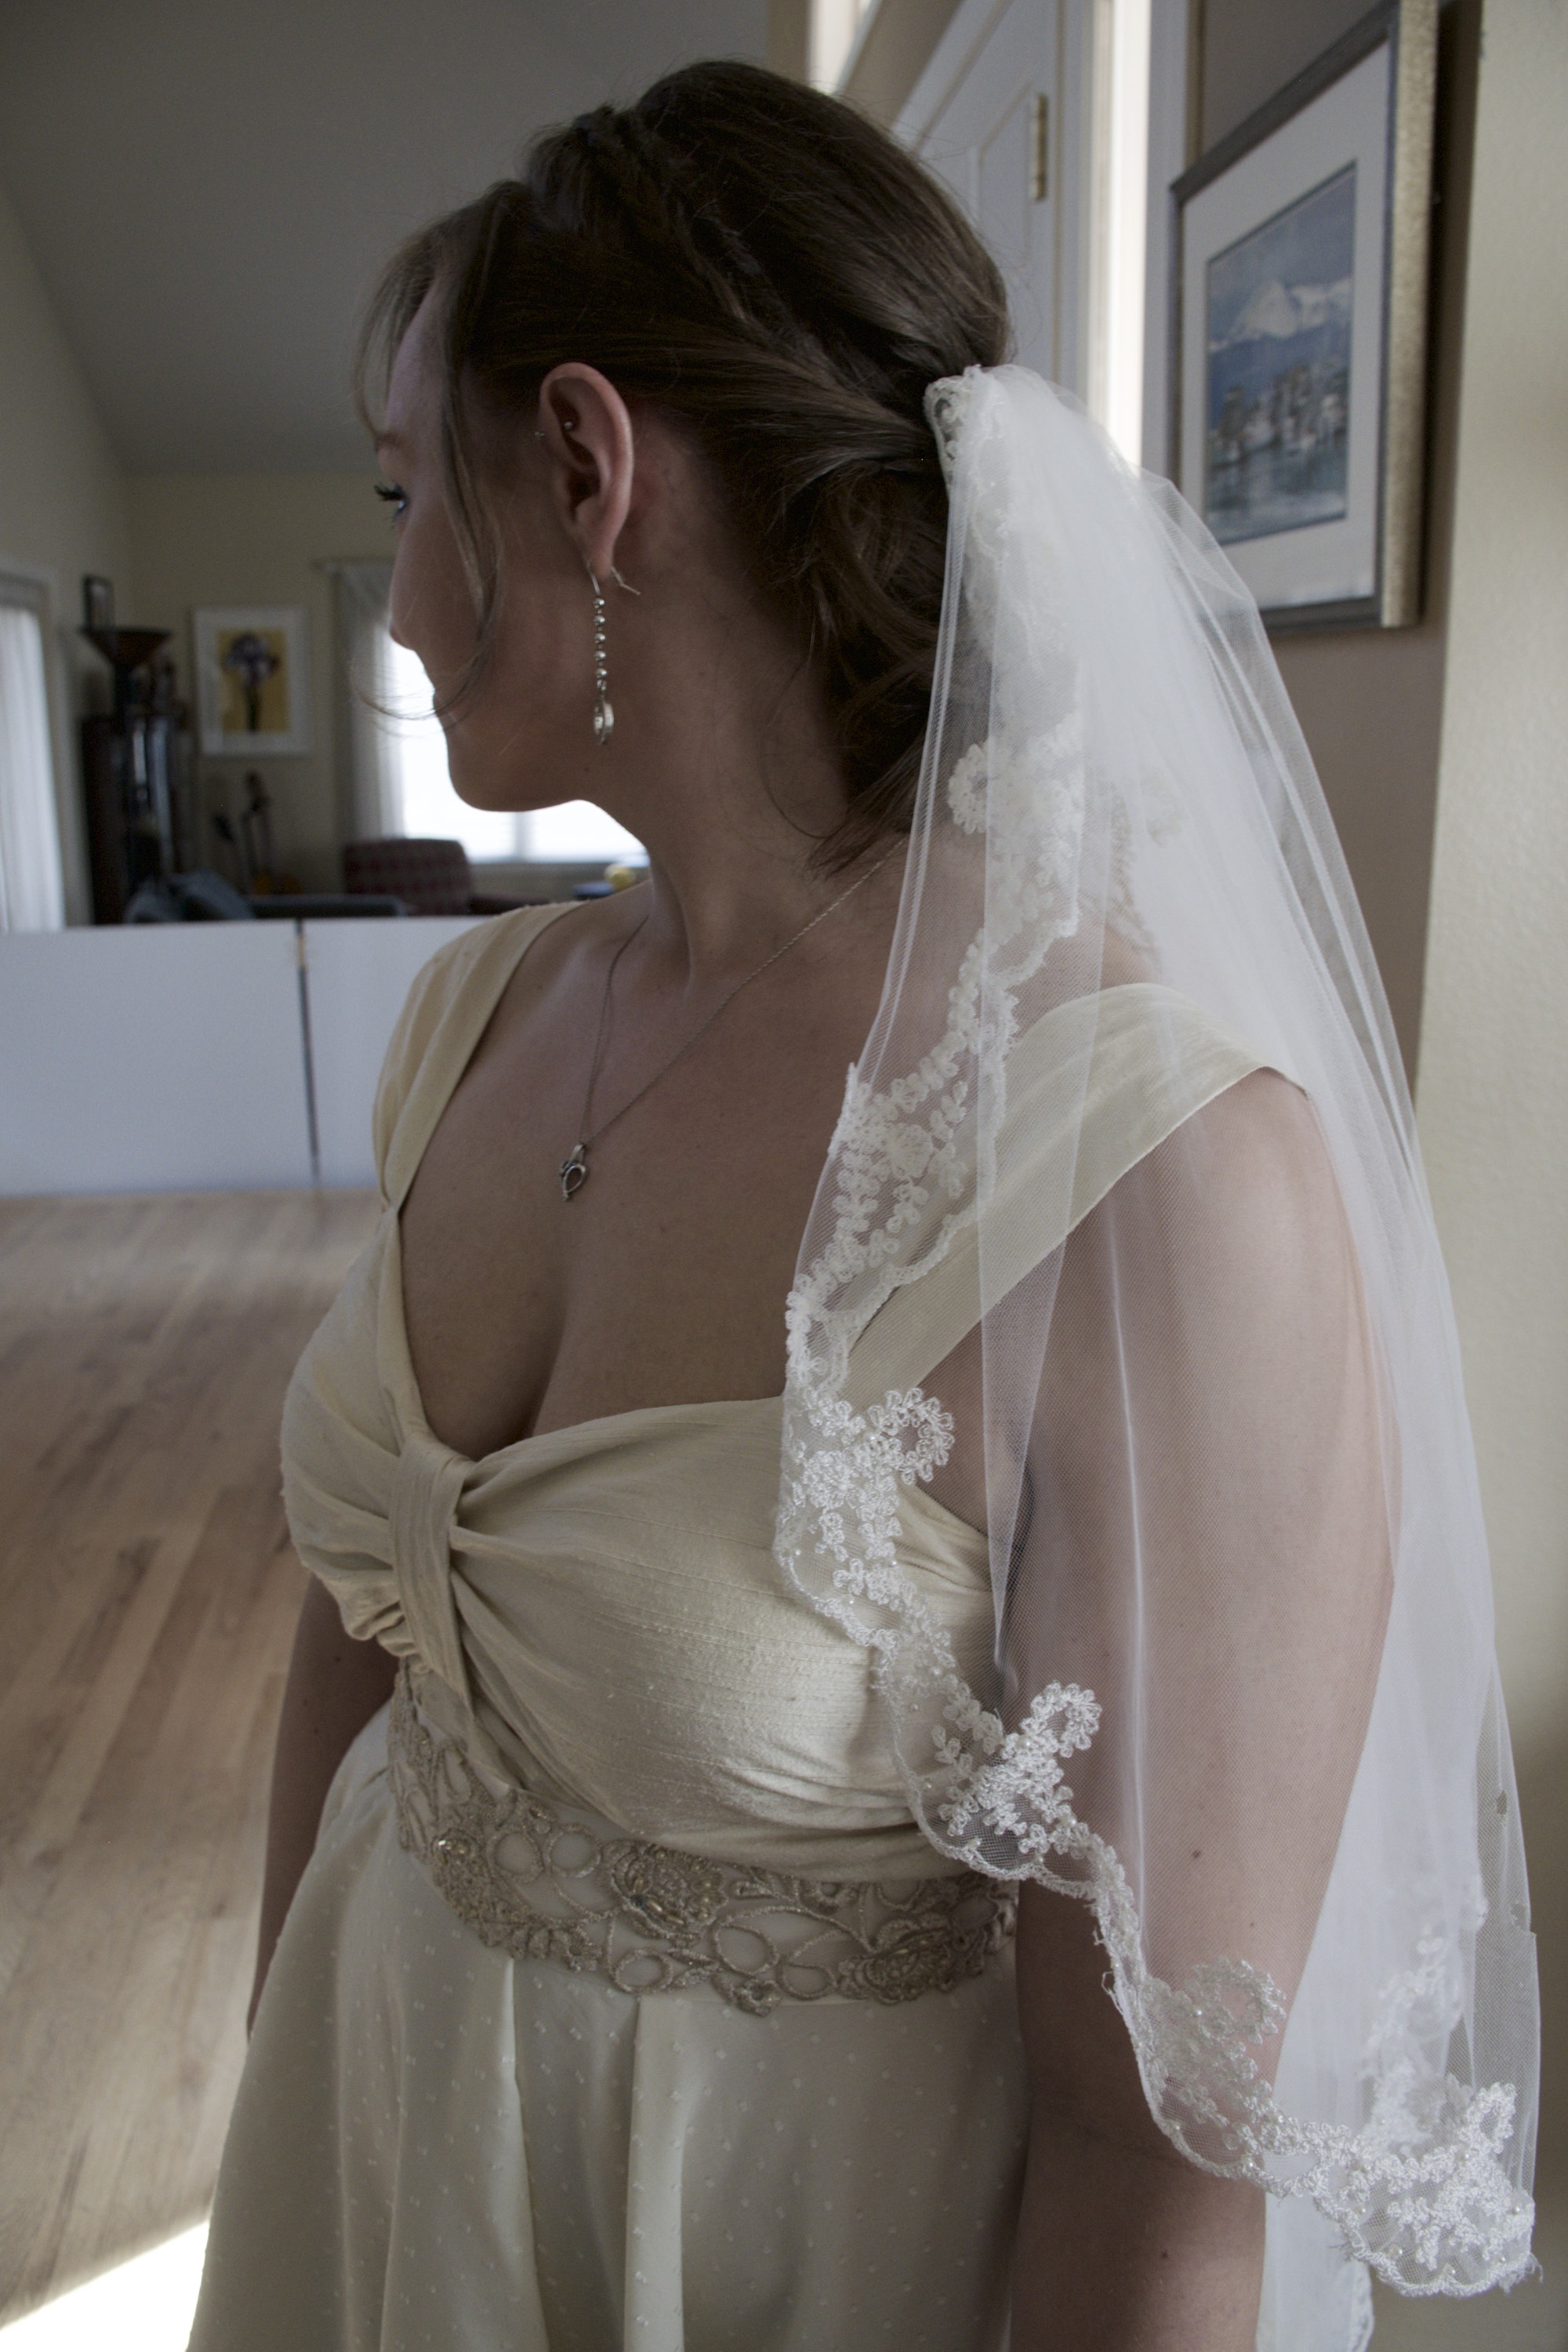

If you're not too picky, you can find some simple tulle at the fabric store and still keep this reasonable. But if your mom/mother-in-law/sister/cousin/aunt/etc. has a veil they don't mind giving you, this could be a great way to save some money (some store-bought veils are more expensive than my dress!), and a fun way to include something borrowed!
I also made a bow from some leftover fabric from my dress, just in case I decided to swap the veil out since it was long (I ended up wearing the veil all evening). You can check out my Bow Tutorial here.
I did have even more DIYs (my dress, a matching clutch, mason jar flower hangers...) but these were a few of my favorites.
Happy Wedding Crafting!
